Use @Initbinder in Spring MVC
In this blog we will learn how to use @initbinder Annotation in Spring MVC. We will walk through a small example with help of a demo application.
If you’re familiar with MVC architecture ,you must all be aware that controller is used for processing the web request and rendering the response to the View.
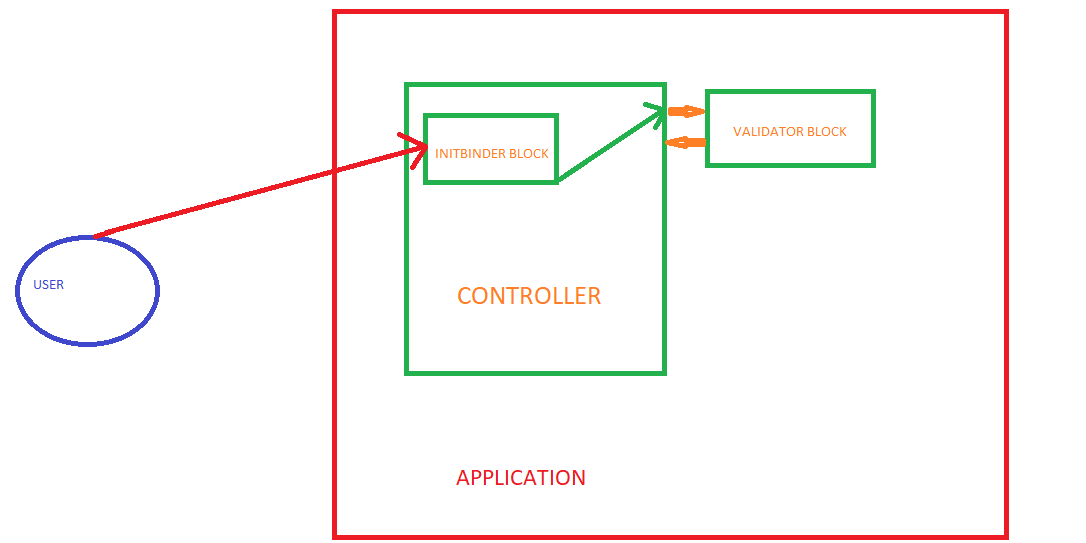
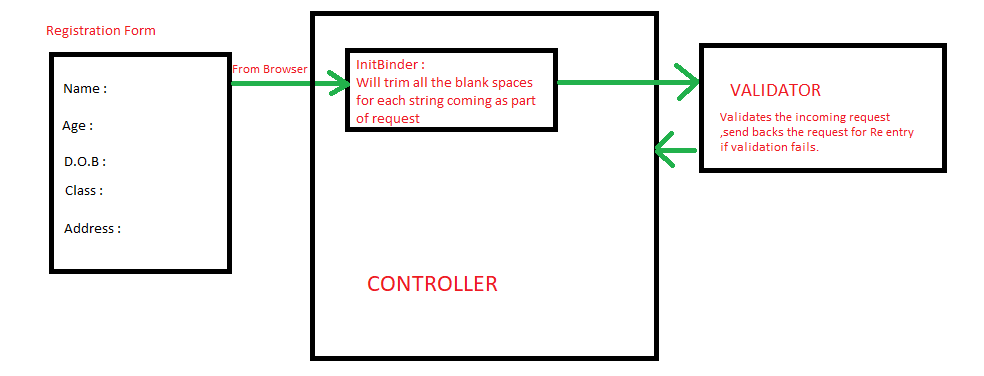
Now,Initbinder comes into picture if you want to customize the request being sent to the controller.It is defined in the controller, helps in controlling and formatting each and every request that comes to it. This annotation is used with the methods which initializes WebDataBinder and works as a preprocessor for each request coming to the controller.

Seems lot of gyaan right ! So,now to explain this let’s take an example.
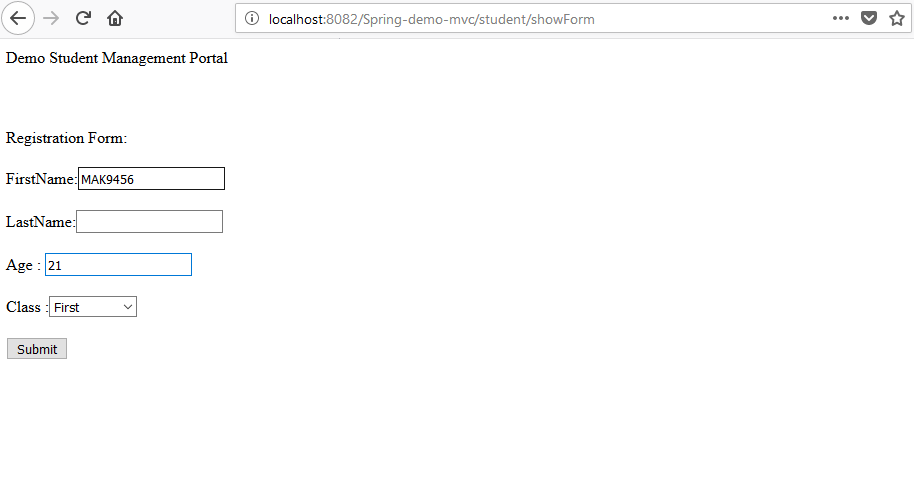
Consider we have student management portal for a school ,which manages the information of all the students present in the school.It has a feature for registering a student when he is admitted to the school.
So the form looks somewhat like:

For a new student information is fed to the system through the above shown form .Consider the values from the Form are well validated and all the values are not expected as Null.
The Problem
If the user inserts some blank spaces for a particular value and submits the form, the validator block will not treat it as Null as spaces are present,Hence the system will take the value as spaces and the subsequent processing will be done.But we don’t want a value with spaces to be present in our Database.That will be a total disaster.
So,to have a check on this case we can consider to use a preprocessor(Initbinder) for the web request, which will trim the values coming as part of request,which means for our case it will also trim the values to Null if only blank spaces are present.

How to implement this?
Consider a model Student which has id, firstname ,lastname, age and other basic details.This is the model which will carry the info of a student between different spring components.
| import java.security.KeyStore.PrivateKeyEntry; | |
| import javax.validation.constraints.Max; | |
| import javax.validation.constraints.Min; | |
| import javax.validation.constraints.NotNull; | |
| import javax.validation.constraints.Size; | |
| public class Student{ | |
| private String Id; | |
| private String firstName; | |
| @NotNull(message="is required") | |
| @Size(min=1,message="is required") | |
| private String lastName; // validation done to check if lastname is NULL | |
| @Max(value=10,message="Value should between 0 and 10") | |
| @Min(value=0,message="Value should between 0 and 10") | |
| private String standard; | |
| private String Age; | |
| } |
We will add @Initbinder annotated method to the controller,To add a initbinder method we have to declare a method with @initbinder annotation ,this method should have WebDatabinder as parameter.
So in our example we will add-
| @InitBinder public void initBinder(WebDataBinder dataBinder) { | |
| StringTrimmerEditor stringTrimmerEditor = new StringTrimmerEditor(true); | |
| dataBinder.registerCustomEditor(String.class, stringTrimmerEditor); | |
| }
We will register StringTrimmerEditor as a custom editor to the databinder with String class as target source.StringTrimmerEditor is a PropertyEditor which we are using in our demo that trims the string values. After registering the custom editor ,initbinder will trim all the String values coming as part of request. Hence ,now if the Name is sent as blank white spaces, Our application will not allow the values to pass through the validator system,avoiding a leak in the system. Conclusion This was a use case where initbinder was used as a preprocessor to trim the string values in the request before reaching the controller.Similarly many more operations like converting the String object to a Date object,adding some extra values to the input can be done.I will leave this onto you to explore the other use cases. |


Comments
Post a Comment